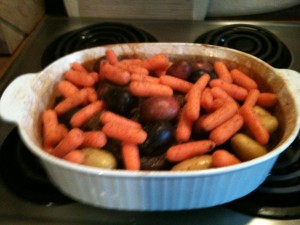
 aaah, pot roast. That all-in-one comfort food, so perfectly balanced with everything we want – so tender and lovely, melting away on the fork, slipping into the gravy like a sultry little temptress, falling apart on the tenderized potatoes and carrots swimming nearby.
I am a fan anyway, so years ago, I had my mother-in-law show me what she did to make hers so good (they are always excellent, Shirley!), and kind of messed around with it for a while to come up with a recipe that always works.
What I am going to offer here, is more for my son and his friends/roomies at college – a nice way to prepare a big (5+ pounds) pot roast for you and the fellas…a family style meal, that allows you to build it, leave it for most of the run, and then come back to eat it later with everyone – not be fixing sauces or shit when it is go time.
So if you are like my son and his pals at college this year, you don’t have a lot of room or anything to play with beyond a fridge, and an oven.
You’ll need:
- A pan to sear (brown) the roast – a frying pan big enough to hold it. If the roast is too big for your frying pans, you might use a larger baking dish on the stovetop to get thru the browning part.
- An oven
- A roasting pan that allows for the roast, as well as the veggies (note: you can buy a tinfoil one at any large grocery store, and pitch it when you are done if you need to) – it has to fit in the oven too, if you have a small oven.
Ingredients:
- The Roast – assuming you have a big one, like 5-7 pounds or something like that
- Seasoning (this is a dry rub, so it is whatever you want it to be – I’ll give you some ideas below)
- Flour (enough to thoroughly dust the roast, probably a cup or so)
- Olive oil (just a little bit)
- Veggies – limited to what you want, but standard issue would be onions (probably 2-3 vidalias or sweet onions, cut into bite size pieces), carrots (cut) or baby carrots, mushrooms and potatoes (like yukon gold, or red, or any kind of little potato you want – if you use large ones, you’ll need to cut them first, and they will mush up on you – so using small, whole potatoes of whatever type is better. I try to use as many as I can here – a bag full anyway.)
Rubbing Your Meat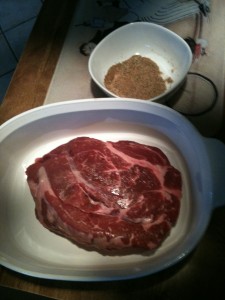
OK – as a BBQ guy, I like the use of dry rubs on meats that I cook for long times – I think they bring out flavors, and add depth to otherwise simple cuts, and a roast is a great example of bland, weak meat that benefits from what you can bring into it thru a balanced rub.
So what you blend to create your rub, is up to you and becomes a bit of a personal thing – but mix-up some dry spices in a bowl to coat the roast. If you need help making one up, use garlic powder, onion powder, salt, pepper, cayenne, rosemary, thyme, marjoram, and maybe some cracked red pepper or other extras and you’re gonna have a beauty. You can go with other things like allspice and cumin to add different tones and flavors to it – but the base seasoning to bring out some of the characteristics you want if you are after that old familiar taste, should be garlic, onion, salt and pepper. That gives it the “classic” taste with flavors you’ll remember.
Be generous with the rub – the meat will be covered with more stuff and cooked a long time, so don’t skimp.
I use the little bowl, rather than sprinkling the ingredients directly on the meat – this allows me to mix and balance it before I apply it, and it allows me to season every bit of the surface – I use my hands, and work it in there.
For some fun things to try with the rubs, look at blending brown sugar with hot, spicy seasonings – there are gazillions of ways to go there.
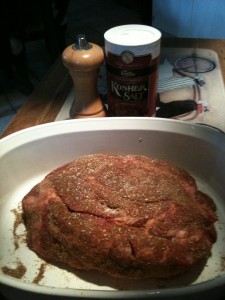
In the picture over here to the left, you can see I have the Kosher salt and the pepper mill there.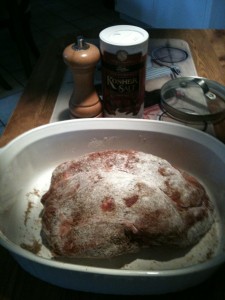
If you are not using kosher salt, chances are good that the salt you use kind of disappears into whatever you are cooking. This may be what you want, but for me, I want to find the salt in there – I don’t want to absorb it, I want to taste it. And by taste, I am not suggesting being overwhelmed by too much of it – simply the little edge you get from kosher salt, staying in there a little longer comparatively. Same goes for the pepper – the difference in crunching the peppercorns or using the dry stuff is night and day, as far as flavor goes.
In the case of the classic pot roast, we are looking for salt and pepper tastes – so I suggest going with kosher or sea salt, and crushed peppercorns. For this one, I added these spices AFTER I rubbed it with other stuff.
Once the meat is properly seasoned, you are going to dust it with flour so you can brown it, as seen to the right, above. Maybe now, turn on the oven to bake at 350, so it will be ready for you.
Brown the Meat
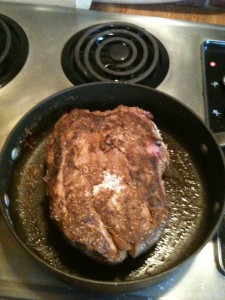 After you have the roast properly seasoned and floured, you want to sear it in a hot pan with a little oil in it. What this will do is create a nice little crust on the outside, plus, it helps to seal in the juices as it cooks.
Heat a skillet big enough to hold the roast, and put olive oil in – enough to coat the bottom. 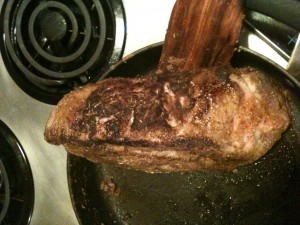 Let it get really hot – you don’t want to put the meat in too soon, and have the pan heat up with the meat in it, that’ll totally mess up your browning. But just a couple minutes per side – and if you can manage it without making a mess, searing the edges is a nice touch.
Over on the right there, you can see I am doing just that. I think it helps to seal it all up, like a big flavor football for you.
 Once the meat is browned on every surface as you want (and edges are an option, not necessity) transfer it to the roasting pan. I usually have a bed of onions, waiting there.
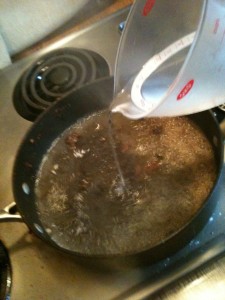
Then you want to quickly deglaze the searing pan, so all that flavor that seared into it can be part of your meal.
Keeping the empty frying pan on the med-high heat you had it for searing, pour in a about a cup and a half of water, slowly.
You’ll see it turn colors, and pull all the seared bits off the pan – this is what you want. Stir it a couple times, to get everything off the pan, then just pour it over the roast in the roast pan.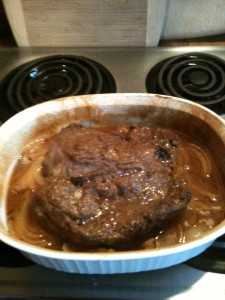
This water will become your gravy, and will tenderize the roast as it cooks.
Usually, I will hit the roast with a couple shots of Worcestershire sauce, then cover the whole thing with tinfoil. Then you’re good to go – you want to cook the meat on its own for a good hour or two, then add the veggies later. On the right, is what it looked like after I cooked it for 90 minutes at 350. You may need to add a little more water – depends on how well you seal the tinfoil and how much cooks up/off.
Cooking, and Finishing the Pot Roast
The actual cooking time you need, depends on the size of the roast. Anything over 2 pounds I like to give at least 3 hours to – extra time tenderizes. But at 300 degrees or so, an hour per pound is about right. The veggies should be added about an hour before you want to eat…assuming you are over 300 degrees.
Think of it like BBQ, in that a large hunk of meat likes to cook long and slow, at a lower heat. So if you do the initial hour at 350, you could do the long stretch at maybe 250-300, and add more time. If given a choice, always opt for lower heat, longer time for a good roast. Make sure you have enough water in it too, to be cooked into it…if you cook that off too fast, the roast can get really dry.
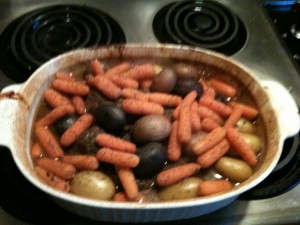 This one took just under 3 hours – I did 90 minutes with the roast alone, then close to that again with the veggies. I added a little dill, and salt and pepper to the veggies. It was at about 300-350 the whole time. I kept it covered it in tinfoil while cooking too, to help retain juices.
But the cool thing with this, is once it goes in the oven, other than adding the veggies it is hands-free. It may take a couple hours, but it is worth it, and you can play XBox or study while it cooks. Study! It’ll make the house smell fantastic while it cooks.
One thing you can do, is pre-prep: brown the meat and cook it for an hour then wrap it, and wait to finish it until you want to eat it. You could prep the meat in the morning, come home for lunch and throw it in the oven (probably lower than 350, depending on your timing), come home from classes and add the veggies to finish it, cooking it at 350 for an hour. A crock pot opens other options too.
The Key: Not Everything at Once
The key to your classic pot roast, is to not add everything at one time, up front. That may be easier, but it will turn the veggies into mush after a couple hours.
Instead, if you season, sear, and roast the meat and then add your veggies to finish it, everything has and holds onto more of a character you can appreciate. Don’t make something that is easy, something stupid because you want to cut corners. It does take a little time and care to brown the meat and time it all out right, but the results will have you licking your plates. And it is really easy, no matter how it seems after all this talk about it.
I guess to finish this Auburn style, there has to be some beer involved, but I am not going to support that kind of behavior. War Damn Eagle!

